
How to Set Up GitHub Actions to Auto-Deploy to a VPS (Step-by-Step)
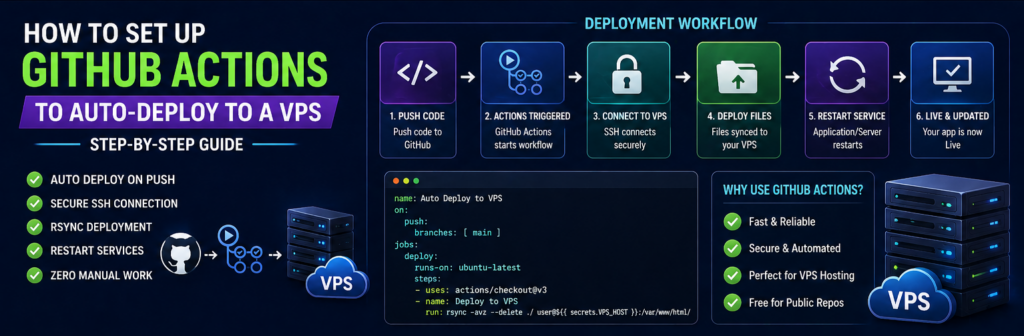
Deploying applications manually to a VPS is one of the biggest bottlenecks in modern development.
Uploading files, restarting services, and fixing errors manually wastes time and increases risk.
The solution?
👉 Automate everything using GitHub Actions
In this guide, you’ll learn how to set up GitHub Actions to automatically deploy your application to a VPS.
What You’ll Achieve
- Push code → Auto deploy
- No manual steps
- Secure deployment
- Faster workflow
Prerequisites
- VPS server
- SSH access
- GitHub repo
Step 1: Set Up VPS
Install required tools:
sudo apt update
sudo apt install rsync -y
Step 2: Configure SSH Access
Generate key:
ssh-keygen
Copy to server:
ssh-copy-id user@server-ip
Step 3: Add Secrets to GitHub
Add:
- VPS_HOST
- VPS_USER
- SSH_PRIVATE_KEY
Step 4: Create Workflow File
.github/workflows/deploy.yml
Step 5: Add Deployment Workflow
name: Auto Deploy VPS

on:
  push:
    branches:
      - main

jobs:
  deploy:
    runs-on: ubuntu-latest

    steps:
      - uses: actions/checkout@v3

      - name: Setup SSH
        run: |
          mkdir -p ~/.ssh
          echo "${{ secrets.SSH_PRIVATE_KEY }}" > ~/.ssh/id_rsa
          chmod 600 ~/.ssh/id_rsa

      - name: Deploy
        run: |
          rsync -avz . user@${{ secrets.VPS_HOST }}:/var/www/app/
Step 6: Restart Application
Example:
ssh user@server "systemctl restart nginx"
Step 7: Test Deployment
Push code and verify.
Advanced Setup
Branch-Based Deployment
- main → production
- dev → staging
Zero Downtime Deployment
Use symlink switching.
Security Best Practices
- Use SSH keys
- Limit access
- Rotate keys
Common Issues
Permission Denied
Fix SSH permissions.
Deployment Fails
Check logs in GitHub Actions.
Best Practices
- Keep deployment simple
- Use logging
- Monitor server
Real-World Insight
Automation saves hours every week and prevents human errors.
FAQs
Is GitHub Actions free?
Yes (with limits).
Can I deploy any app?
Yes.
Final Thoughts
Setting up auto-deployment using GitHub Actions is one of the best upgrades you can make to your workflow.